RV window installation takes just two steps, two or three people, and about a couple of hours to do. If you have experience with power tools and have a friend who is willing to give you a hand, you can install your new RV window and save a lot of money.
Here are the steps to a do-it-yourself RV window installation:
Order Your New RV Window
 You can do this online by downloading and printing an order form and filling it up with the details the glass manufacturer needs to customize your RV window. For this step, it is extremely important that you get accurate measurements of your RV’s existing window and window opening.
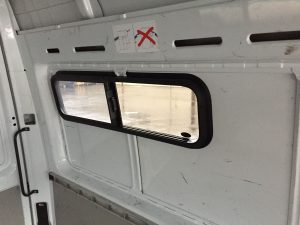
For your new RV window, get the width and the length of the old window. Make sure you get the dimensions for the entire window and not just the area inside the frame. Get the depth of the window by sticking a ruler into the window opening and pushing until it hits the outer frame (read How to Measure for Replacement RV Windows).
Install the New Window
- Prepare the new window by applying butyl tape all around the window frame. Start from the middle of the bottom of the window and continue until the two ends meet and slightly overlap.
- Spray the tape and the perimeter of the window opening with water. This keeps the tape from sticking everywhere as you try to position the window perfectly inside the opening.
- Ask friends to help you install the new RV window by pushing it in gently from both the inside and the outside of the van. Once the window is in place, attach the screws.
Have any tips for RV window installation? Share it with us in the comments.